How To Make: Gunnerkrigg Cookies!
Apr 25, 2015 0:24:25 GMT
keef, sapientcoffee, and 7 more like this
Post by TheClockworkCoyote on Apr 25, 2015 0:24:25 GMT
First off: Yes, the recipes use US measures; my apologies. I'll try to convert the recipes where possible for those who use weight rather than volume as a measuring system (can you tell I've had this argument before?  ). Conversions are via this list: www.kingarthurflour.com/recipe/master-weight-chart.html so if something seems wrong, double-check in case I've grabbed the wrong number. Also, my apologies for the sometimes poor quality images.
So, on with the show...
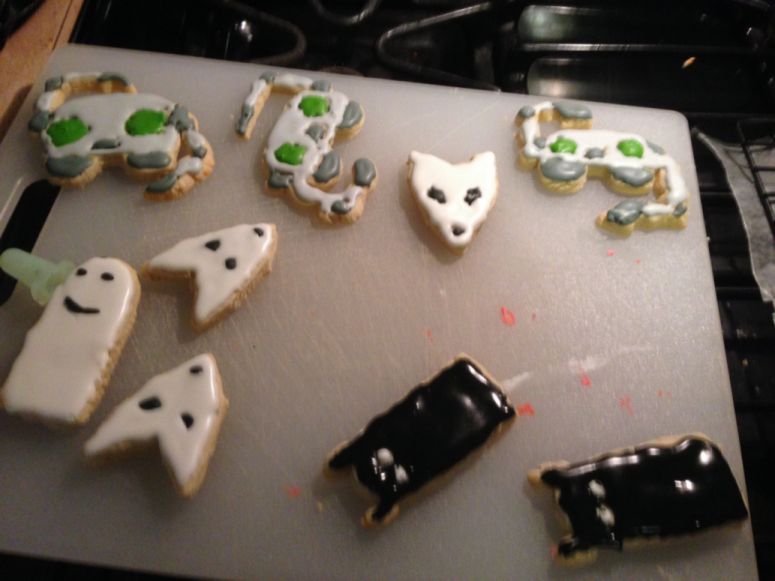
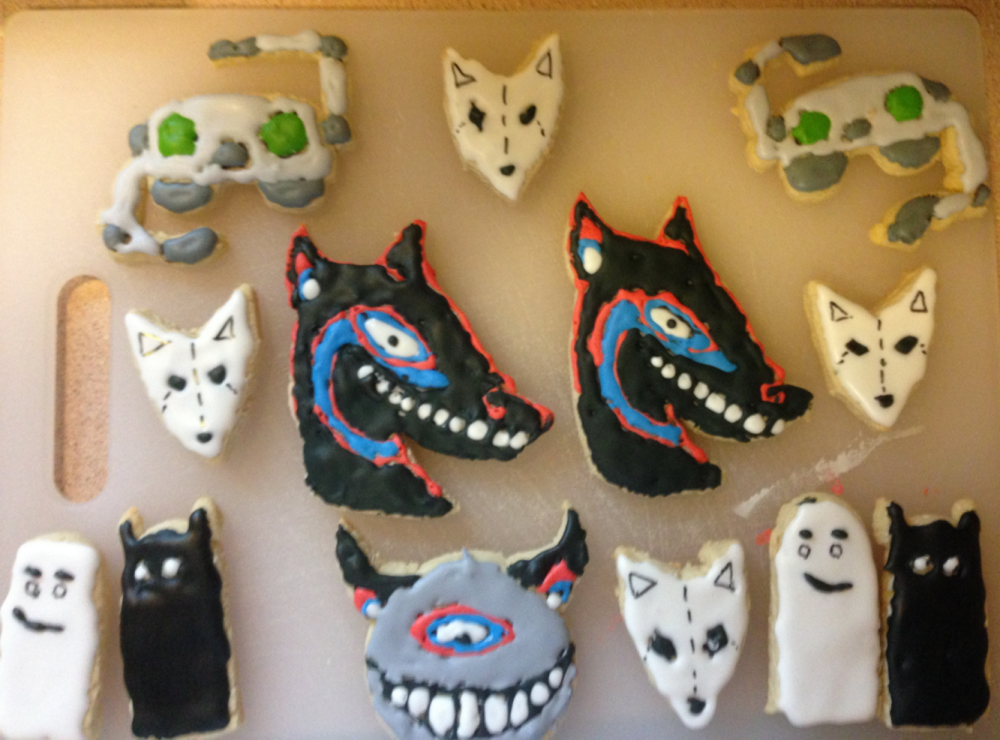
Welcome to Cookie Baking & Decorating! In today's class, we will be attempting to create cookies depicting some of the individuals and creatures lurking around Gunnerkrigg Court and its environs.
First, the basic cookie dough:
Ingredients:
1 cup (8 ounces) unsalted butter, softened -- ie: leave it sit out an hour or two until it yields at your touch.
1 cup (7 ounces) sugar
2 large eggs
2 teaspoons vanilla extract
1 teaspoon almond extract
3 1/2 cups (~15 ounces), all-purpose flour
2 teaspoons baking powder (Do _NOT_ mix up baking powder and baking soda. Everyone inevitably does this at some point.)
1/2 teaspoon salt
1. In a large bowl, beat together the butter and sugar using a mixer at medium speed until creamy. Next, beat in the eggs and extracts.
2. In a medium bowl, combine the flour, salt and baking powder. Gradually add this mixture to the first bowl, beating until combined.
3. Cover the bowl with plastic wrap and place in the refrigerator for at least an hour. If, like me, you tend to leave the dough in the fridge overnight, you may in the morning need to let it sit out for an hour or so to warm up to make it more pliable.
4. Lightly flour your work surface and roll out the dough (depending on the size of your work surface, you may wish to do this in segments, with the remaining dough resting in the bowl until needed). You want it about a 1/4-inch thick.
5. Cut your cookies -- more on this below!
6. Preheat the oven to 350F (180C)
7. Lightly grease a cookie sheet or spray it with a non-stick cooking spray and place the cookies on it with about 2 inches of space between them. Bake for 10 minutes, or until bottom edges are lightly browned. Remove the sheets from the oven and allow to rest for 2 minutes before carefully removing the cookies to cooling racks.
We won't need to make this until much later (possibly the next day), but here's the recipe for the icing:
Royal Icing:
Ingredients:
4 tablespoons (60 mL) meringue powder
1/2 teaspoon (2.5 mL) cream of tartar
2/5 cup (5.25 ounces; 160 mL) water
8 cups (32 ounces; 888 g) powdered (confectioners) sugar, sifted
1) In a large bowl, combine the meringue powder, cream of tartar, and water. Beat on high speed until stiff peaks form.
2) Add the sugar to the meringue, beating on low speed until the ingredients are fully combined. Then, increase speed to high for several minutes or until stiff peaks form once again.
3) Keep the icing bowl covered with a damp towel until ready to use. This is important as it keeps the icing from drying out as you work.
...now, we're going to modify the above Royal Icing into "Run Sugar". This requires a little bit of experimentation...
1) Take a couple large spoonfulls of the icing (recovering the bowl with the damp towel!) and place them in a small bowl.
2) Add your food coloring (I mostly used Wilton's brand of cake/cookie colorings) and mix it thoroughly until you have an even color. (I recommend using a popsicle stick, flat toothpick (the big ones used to pin sandwiches together), or the like rather than a spoon). Only use a tiny bit of dye, as depending on product a little may go a _long_ way (various brands of blue, for example, tends to quickly dye darker with less used than reds in my experience).
3) You've got a color you like? Great, now splash in a tiny bit of water and mix it thoroughly. What you're looking for is to make this about the consistency of honey.
4) To test it, drip some onto a piece of parchment paper and try cutting through the puddle with the tip of a knife. The puddle should hold the cut briefly, then begin to slowly ooze back together over the course of, say, 8-10 seconds. Too thick? It won't try to seal up. Add more water and try again. Too thin? It won't cut at all. Add more icing or powdered sugar to thicken it (be aware you may then have to adjust the color).
5) Spoon the mixture into a 12 inch pastry bag with a Number 4 (unless specified otherwise) Round Decorating Tip (that's Wilton's designation, anyway. I'm afraid I don't know what it might equate to with other manufacturers).
6) Only make one color at a time. You will find yourself having to wait a bit for the first color on a cookie to set before you apply the bordering color.
And now, the shaping of the cookies, class!
We'll start with the simplest:
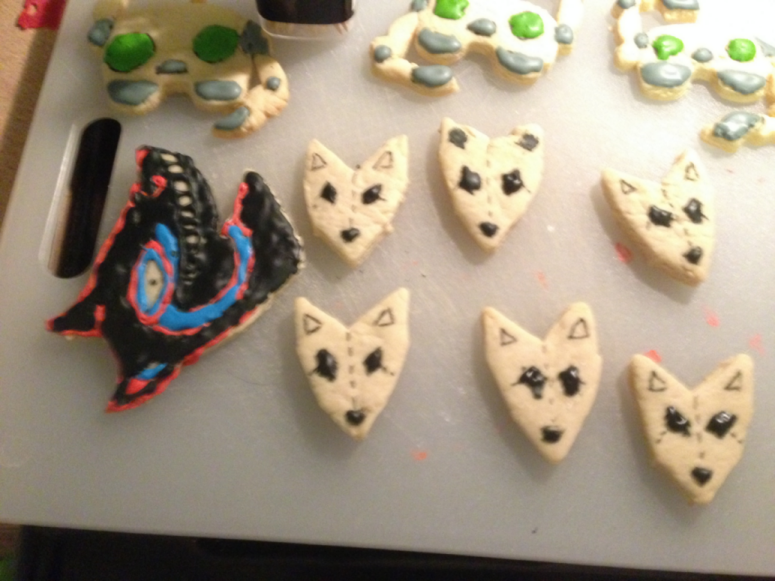
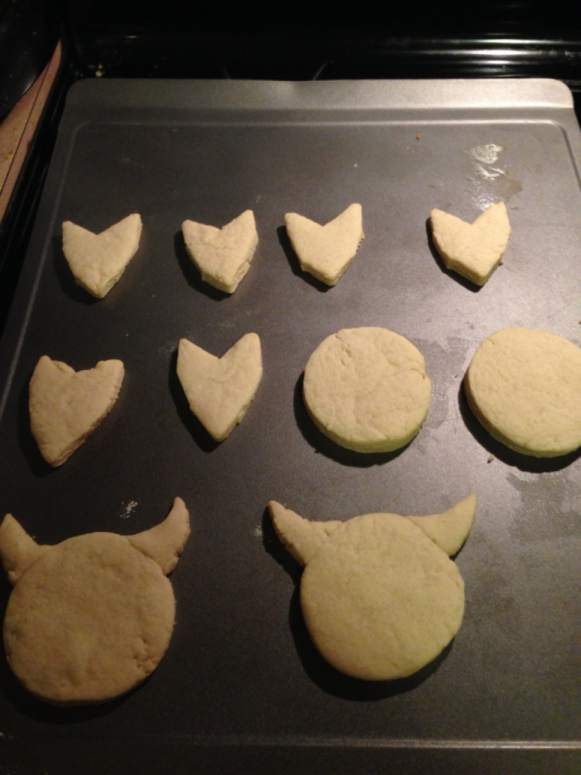
Reynard: Take a star-shaped cookie cutter and cut out a few. Using a paring knife, carefully slice off the side 'arms' of the star, and deepen the angle between the 'legs'. Turn it upside down, the 'legs' of the star are now the ears, the 'tip' of the star is the nose.
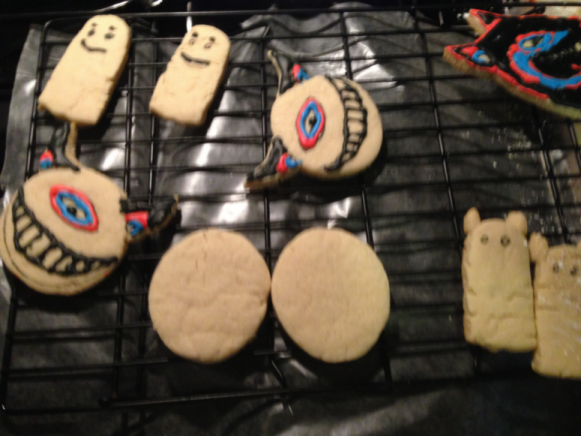
Mort and Shadow: Find a ghost-shaped cookie cutter. In the US, you probably won't be able to walk into a grocery, convenience, or craft store in October without finding these somewhere in the Halloween displays. Cut out the ghosts. If necessary, carefully cut the sides straight (unless you want arms on them, of course). For Shadow's ears, just take a little pinch of excess dough and gently press it onto the sides of the head.
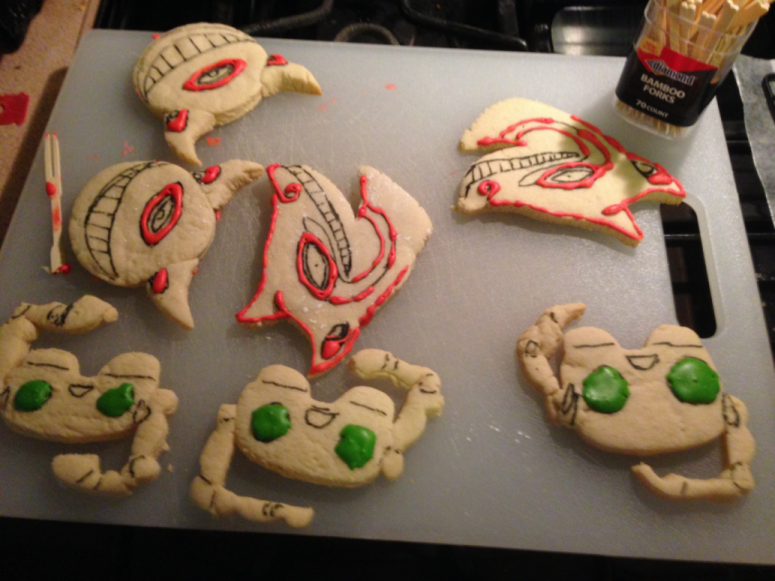
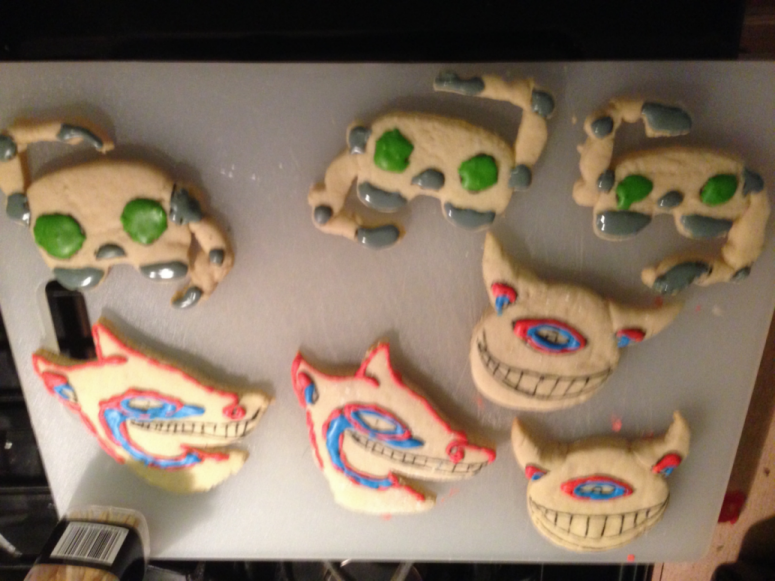
Boxbot: I used this "school bus" cookie cutter: www.karenscookies.net/SugarBelles-School-Bus-Cookie-Cutter-KC_p_1963.html Press it into the dough to make the overall shape, then move it up or down and press it in again so you have the wheels closer to the tapered/curved top of the cutter. Slice off the sides of the initial cut and gently bend them at 90 degree angles to form the arms. Gently press these into place. This is the weakest point of the design, so don't be surprised if they break once baked. We'll deal with that later. Alternate version: carefully with a paring knife, cut out a rectangular shape with sides tapering slightly upwards. Cut a small, square notch at the bottom to form the wheels. Then slice two narrow strips of dough to form the arms.
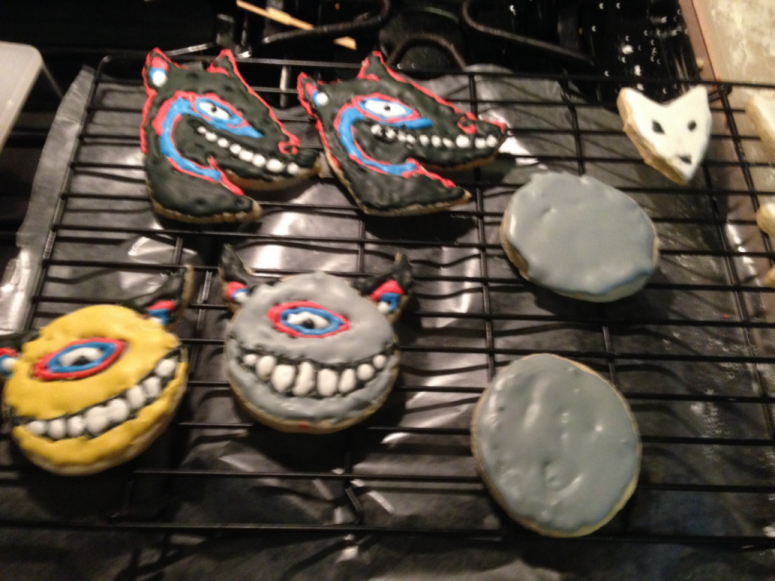
Coyote: Here's where we need to make a template. Here's how I made mine: To start, I went to: www.gunnerkrigg.com/?p=502 I copied the image to a graphics program and cut out a block around Coyote in the upper left-hand corner. I then printed this at, oh, about 150% of actual size. Next, carefully cut out of the printout the image you want. Place this on a piece of cardstock or poster board and trace two copies and cut them out. The first of these will be your cookie template. For the second, carefully cut out the blue band. This will act as your coloring/design template. Place the cookie template on the dough and _carefully_ cut around it with a paring knife. If possible, save the curved triangular piece of dough that you cut out under Coyote's chin. If at any time the Coyote cookies begin talking at you, please contact a faculty member immediately.
Coyote-As-Moon: Cut a circle with a biscuit cutter. Remember those curved triangular bits I said to save from the Coyote cookies? Carefully press them into place on either side of the circle's upper edge to make the ears.
With luck, they should come out of the oven looking something like this:
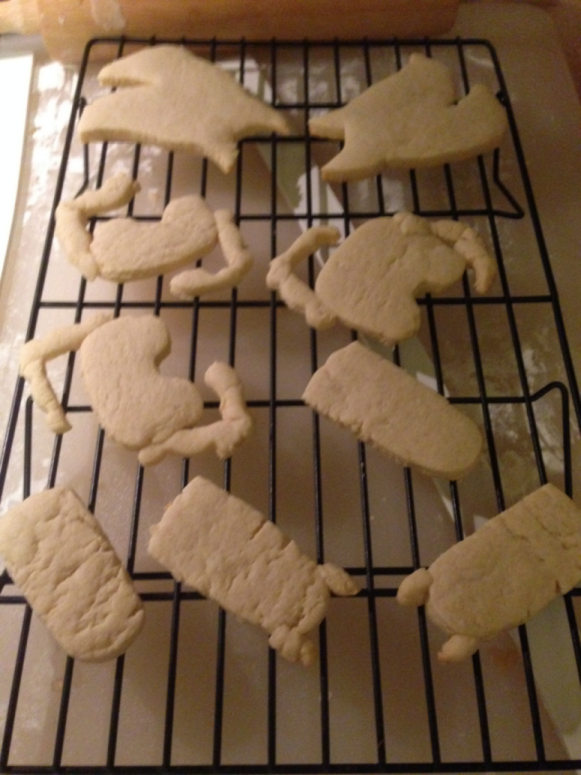
(Any images that won't display can be found in the scraps section of my DeviantArt site: theclockworkcoyote.deviantart.com/gallery/?catpath=scraps )
Allow the cookies to cool _completely_. (Overnight works if you don't mind this turning into a three day project).
 ). Conversions are via this list: www.kingarthurflour.com/recipe/master-weight-chart.html so if something seems wrong, double-check in case I've grabbed the wrong number. Also, my apologies for the sometimes poor quality images.
So, on with the show...
Welcome to Cookie Baking & Decorating! In today's class, we will be attempting to create cookies depicting some of the individuals and creatures lurking around Gunnerkrigg Court and its environs.
First, the basic cookie dough:
Ingredients:
1 cup (8 ounces) unsalted butter, softened -- ie: leave it sit out an hour or two until it yields at your touch.
1 cup (7 ounces) sugar
2 large eggs
2 teaspoons vanilla extract
1 teaspoon almond extract
3 1/2 cups (~15 ounces), all-purpose flour
2 teaspoons baking powder (Do _NOT_ mix up baking powder and baking soda. Everyone inevitably does this at some point.)
1/2 teaspoon salt
1. In a large bowl, beat together the butter and sugar using a mixer at medium speed until creamy. Next, beat in the eggs and extracts.
2. In a medium bowl, combine the flour, salt and baking powder. Gradually add this mixture to the first bowl, beating until combined.
3. Cover the bowl with plastic wrap and place in the refrigerator for at least an hour. If, like me, you tend to leave the dough in the fridge overnight, you may in the morning need to let it sit out for an hour or so to warm up to make it more pliable.
4. Lightly flour your work surface and roll out the dough (depending on the size of your work surface, you may wish to do this in segments, with the remaining dough resting in the bowl until needed). You want it about a 1/4-inch thick.
5. Cut your cookies -- more on this below!
6. Preheat the oven to 350F (180C)
7. Lightly grease a cookie sheet or spray it with a non-stick cooking spray and place the cookies on it with about 2 inches of space between them. Bake for 10 minutes, or until bottom edges are lightly browned. Remove the sheets from the oven and allow to rest for 2 minutes before carefully removing the cookies to cooling racks.
We won't need to make this until much later (possibly the next day), but here's the recipe for the icing:
Royal Icing:
Ingredients:
4 tablespoons (60 mL) meringue powder
1/2 teaspoon (2.5 mL) cream of tartar
2/5 cup (5.25 ounces; 160 mL) water
8 cups (32 ounces; 888 g) powdered (confectioners) sugar, sifted
1) In a large bowl, combine the meringue powder, cream of tartar, and water. Beat on high speed until stiff peaks form.
2) Add the sugar to the meringue, beating on low speed until the ingredients are fully combined. Then, increase speed to high for several minutes or until stiff peaks form once again.
3) Keep the icing bowl covered with a damp towel until ready to use. This is important as it keeps the icing from drying out as you work.
...now, we're going to modify the above Royal Icing into "Run Sugar". This requires a little bit of experimentation...
1) Take a couple large spoonfulls of the icing (recovering the bowl with the damp towel!) and place them in a small bowl.
2) Add your food coloring (I mostly used Wilton's brand of cake/cookie colorings) and mix it thoroughly until you have an even color. (I recommend using a popsicle stick, flat toothpick (the big ones used to pin sandwiches together), or the like rather than a spoon). Only use a tiny bit of dye, as depending on product a little may go a _long_ way (various brands of blue, for example, tends to quickly dye darker with less used than reds in my experience).
3) You've got a color you like? Great, now splash in a tiny bit of water and mix it thoroughly. What you're looking for is to make this about the consistency of honey.
4) To test it, drip some onto a piece of parchment paper and try cutting through the puddle with the tip of a knife. The puddle should hold the cut briefly, then begin to slowly ooze back together over the course of, say, 8-10 seconds. Too thick? It won't try to seal up. Add more water and try again. Too thin? It won't cut at all. Add more icing or powdered sugar to thicken it (be aware you may then have to adjust the color).
5) Spoon the mixture into a 12 inch pastry bag with a Number 4 (unless specified otherwise) Round Decorating Tip (that's Wilton's designation, anyway. I'm afraid I don't know what it might equate to with other manufacturers).
6) Only make one color at a time. You will find yourself having to wait a bit for the first color on a cookie to set before you apply the bordering color.
And now, the shaping of the cookies, class!
We'll start with the simplest:
Reynard: Take a star-shaped cookie cutter and cut out a few. Using a paring knife, carefully slice off the side 'arms' of the star, and deepen the angle between the 'legs'. Turn it upside down, the 'legs' of the star are now the ears, the 'tip' of the star is the nose.
Mort and Shadow: Find a ghost-shaped cookie cutter. In the US, you probably won't be able to walk into a grocery, convenience, or craft store in October without finding these somewhere in the Halloween displays. Cut out the ghosts. If necessary, carefully cut the sides straight (unless you want arms on them, of course). For Shadow's ears, just take a little pinch of excess dough and gently press it onto the sides of the head.
Boxbot: I used this "school bus" cookie cutter: www.karenscookies.net/SugarBelles-School-Bus-Cookie-Cutter-KC_p_1963.html Press it into the dough to make the overall shape, then move it up or down and press it in again so you have the wheels closer to the tapered/curved top of the cutter. Slice off the sides of the initial cut and gently bend them at 90 degree angles to form the arms. Gently press these into place. This is the weakest point of the design, so don't be surprised if they break once baked. We'll deal with that later. Alternate version: carefully with a paring knife, cut out a rectangular shape with sides tapering slightly upwards. Cut a small, square notch at the bottom to form the wheels. Then slice two narrow strips of dough to form the arms.
Coyote: Here's where we need to make a template. Here's how I made mine: To start, I went to: www.gunnerkrigg.com/?p=502 I copied the image to a graphics program and cut out a block around Coyote in the upper left-hand corner. I then printed this at, oh, about 150% of actual size. Next, carefully cut out of the printout the image you want. Place this on a piece of cardstock or poster board and trace two copies and cut them out. The first of these will be your cookie template. For the second, carefully cut out the blue band. This will act as your coloring/design template. Place the cookie template on the dough and _carefully_ cut around it with a paring knife. If possible, save the curved triangular piece of dough that you cut out under Coyote's chin. If at any time the Coyote cookies begin talking at you, please contact a faculty member immediately.
Coyote-As-Moon: Cut a circle with a biscuit cutter. Remember those curved triangular bits I said to save from the Coyote cookies? Carefully press them into place on either side of the circle's upper edge to make the ears.
With luck, they should come out of the oven looking something like this:


(Any images that won't display can be found in the scraps section of my DeviantArt site: theclockworkcoyote.deviantart.com/gallery/?catpath=scraps )
Allow the cookies to cool _completely_. (Overnight works if you don't mind this turning into a three day project).

